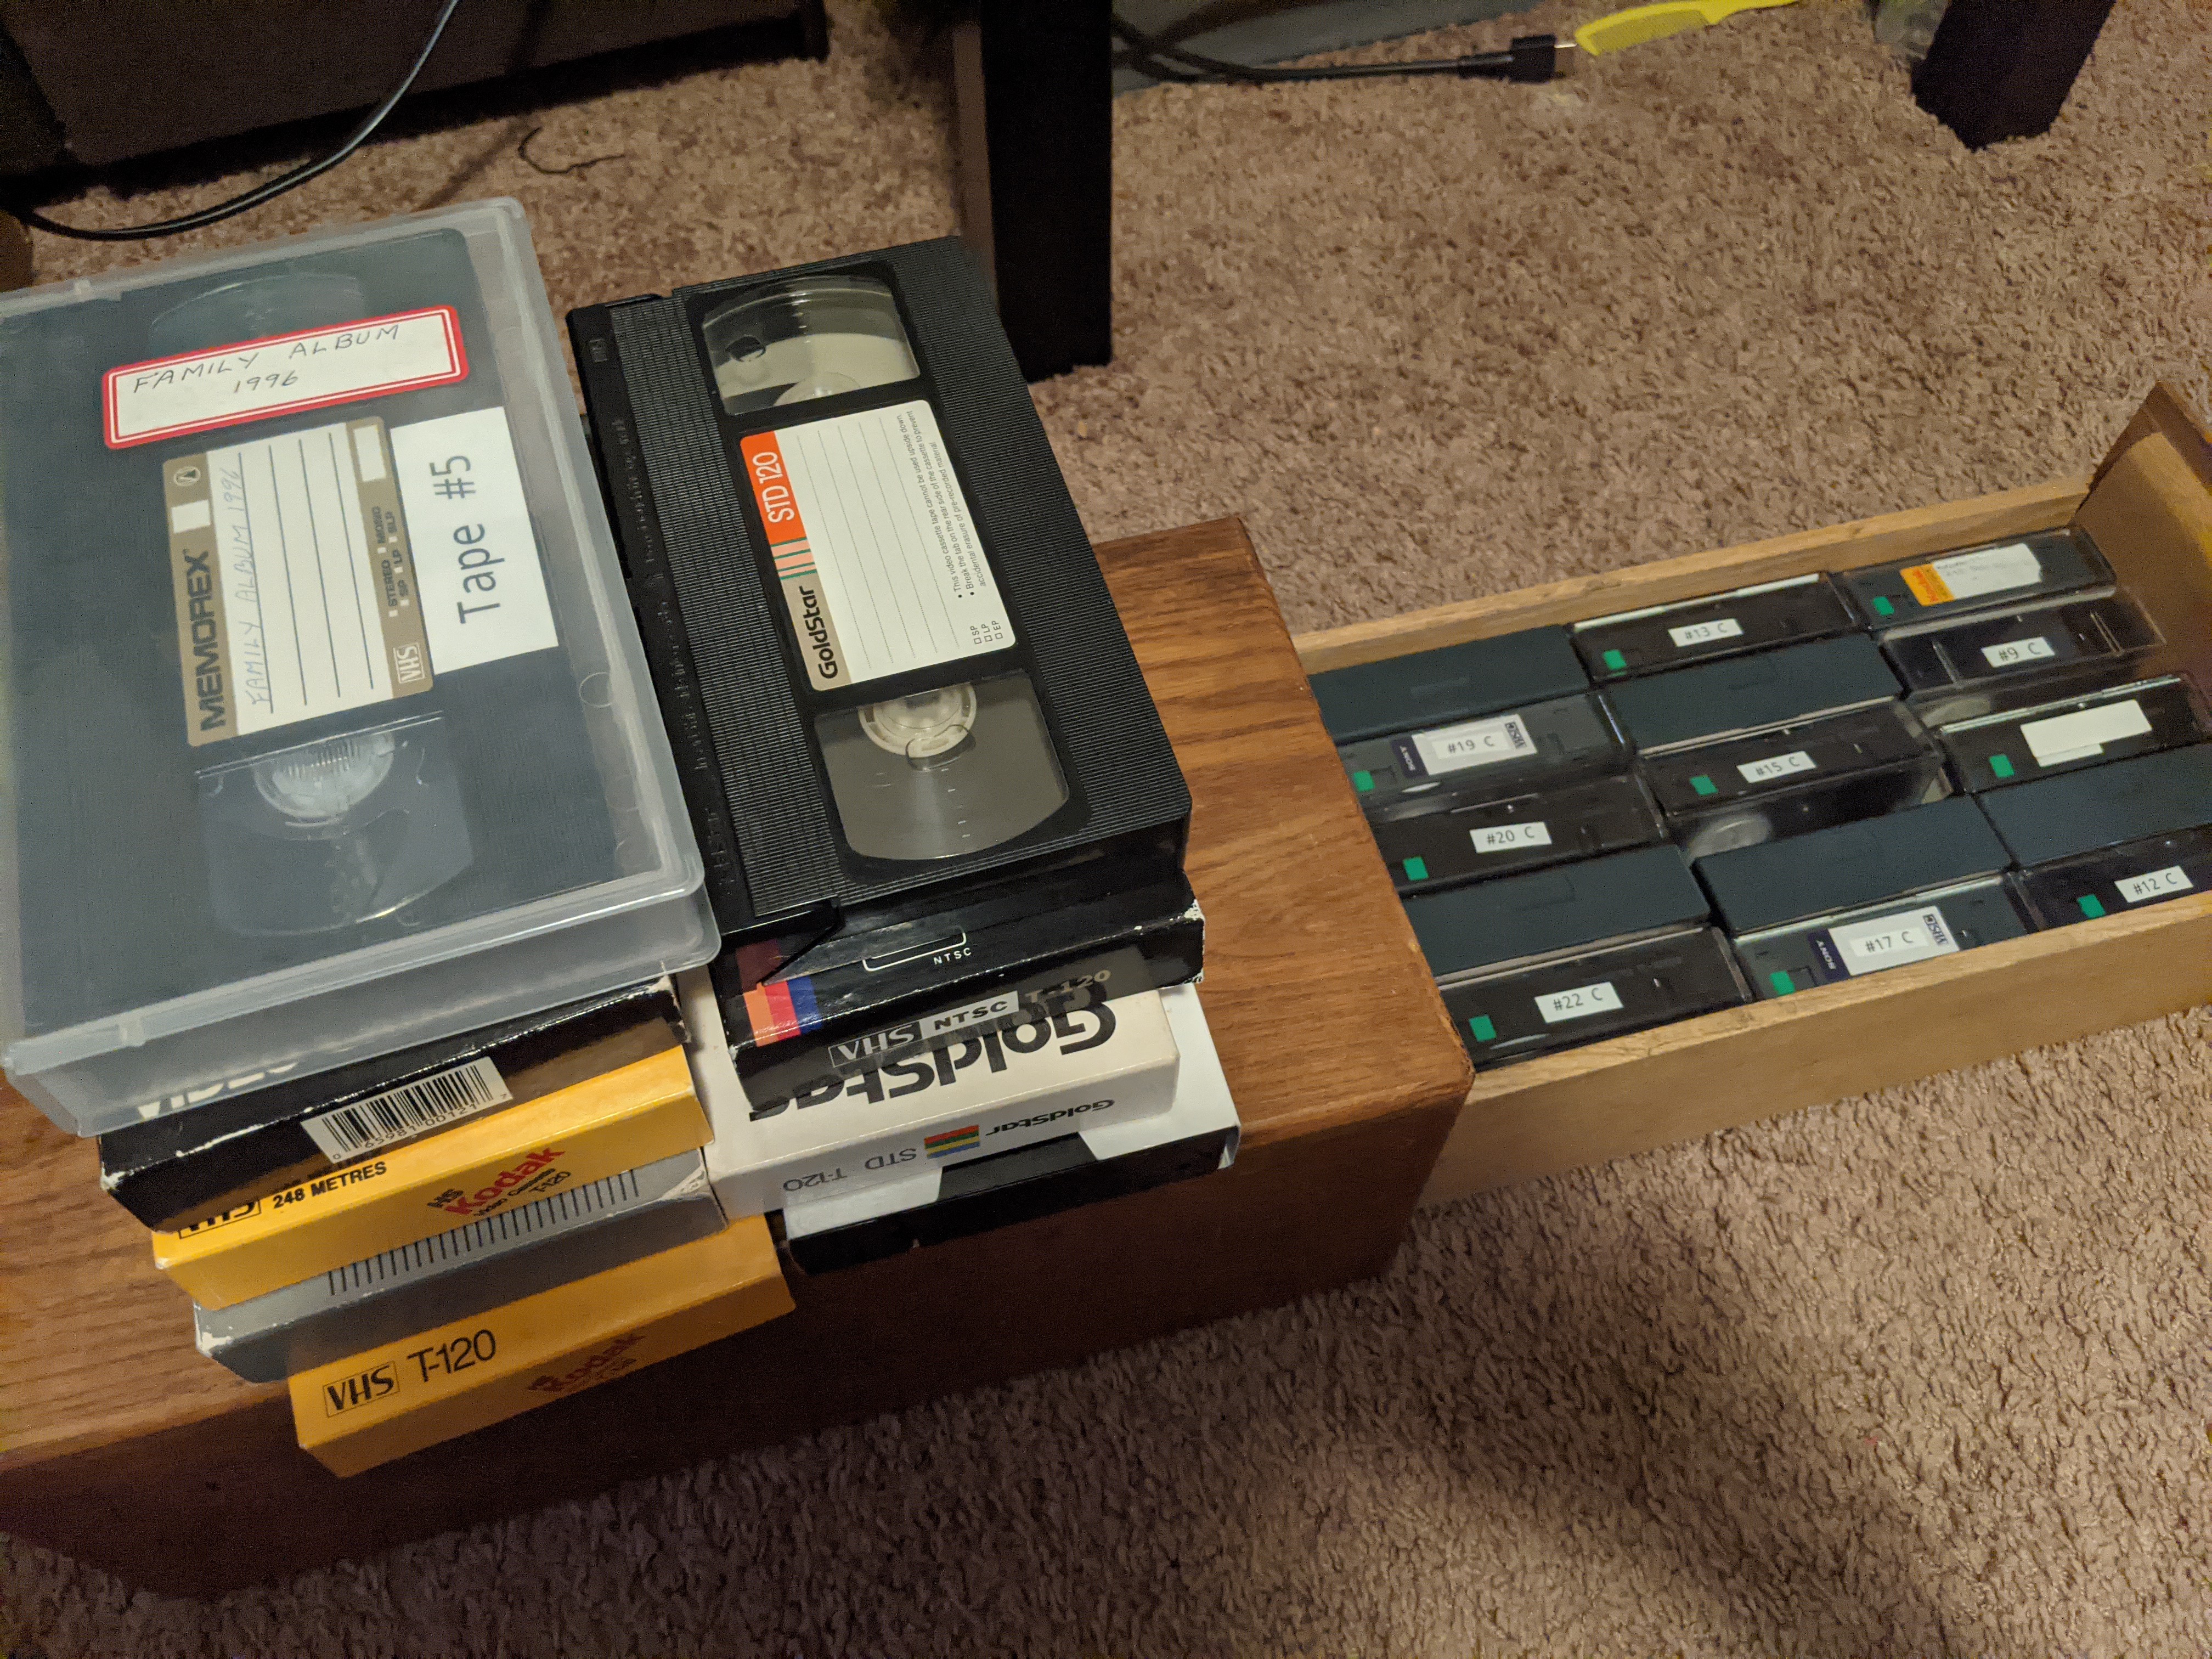
Recently I undertook a project to convert a number of old home movies on VHS tapes to digital. Here is how I did it.
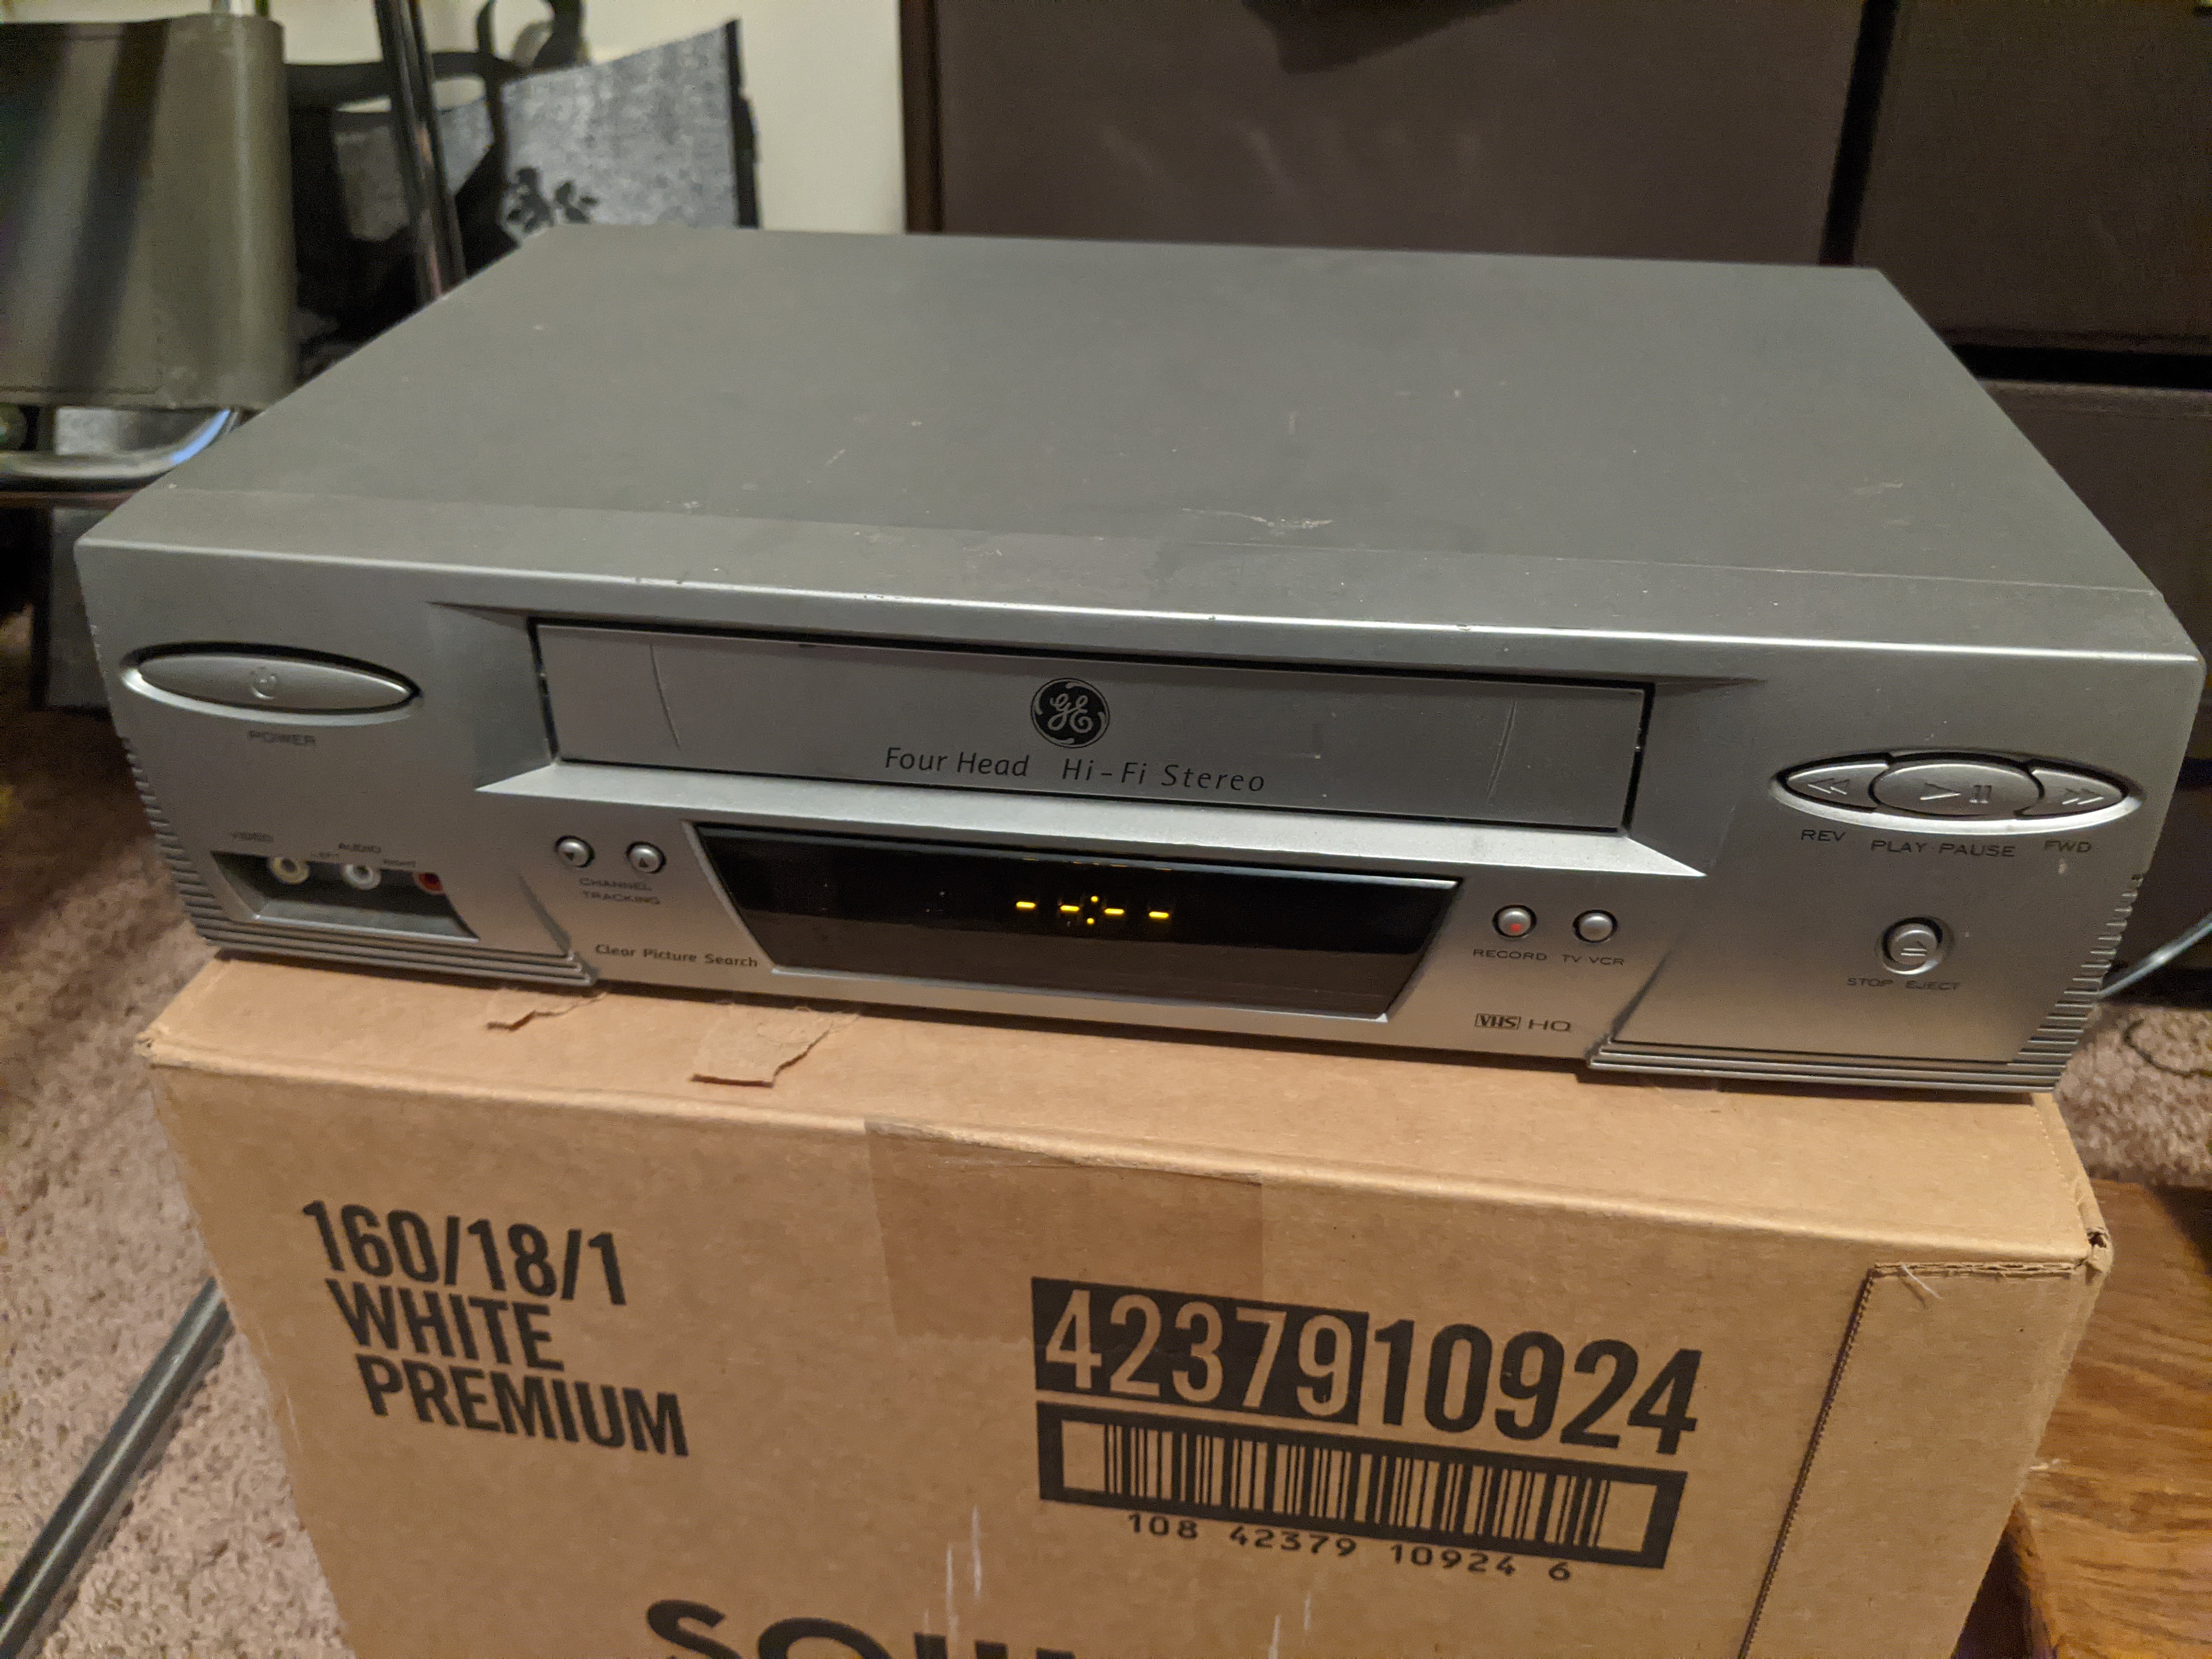
The first problem was how to initially ingest the video. I didn’t have a VCR, so the first step was to get on eBay and get one. Fortunately I found one that was a good price. Also, the seller was not too far away so it arrived quickly. The second problem was how to hookup the VCR to a computer.
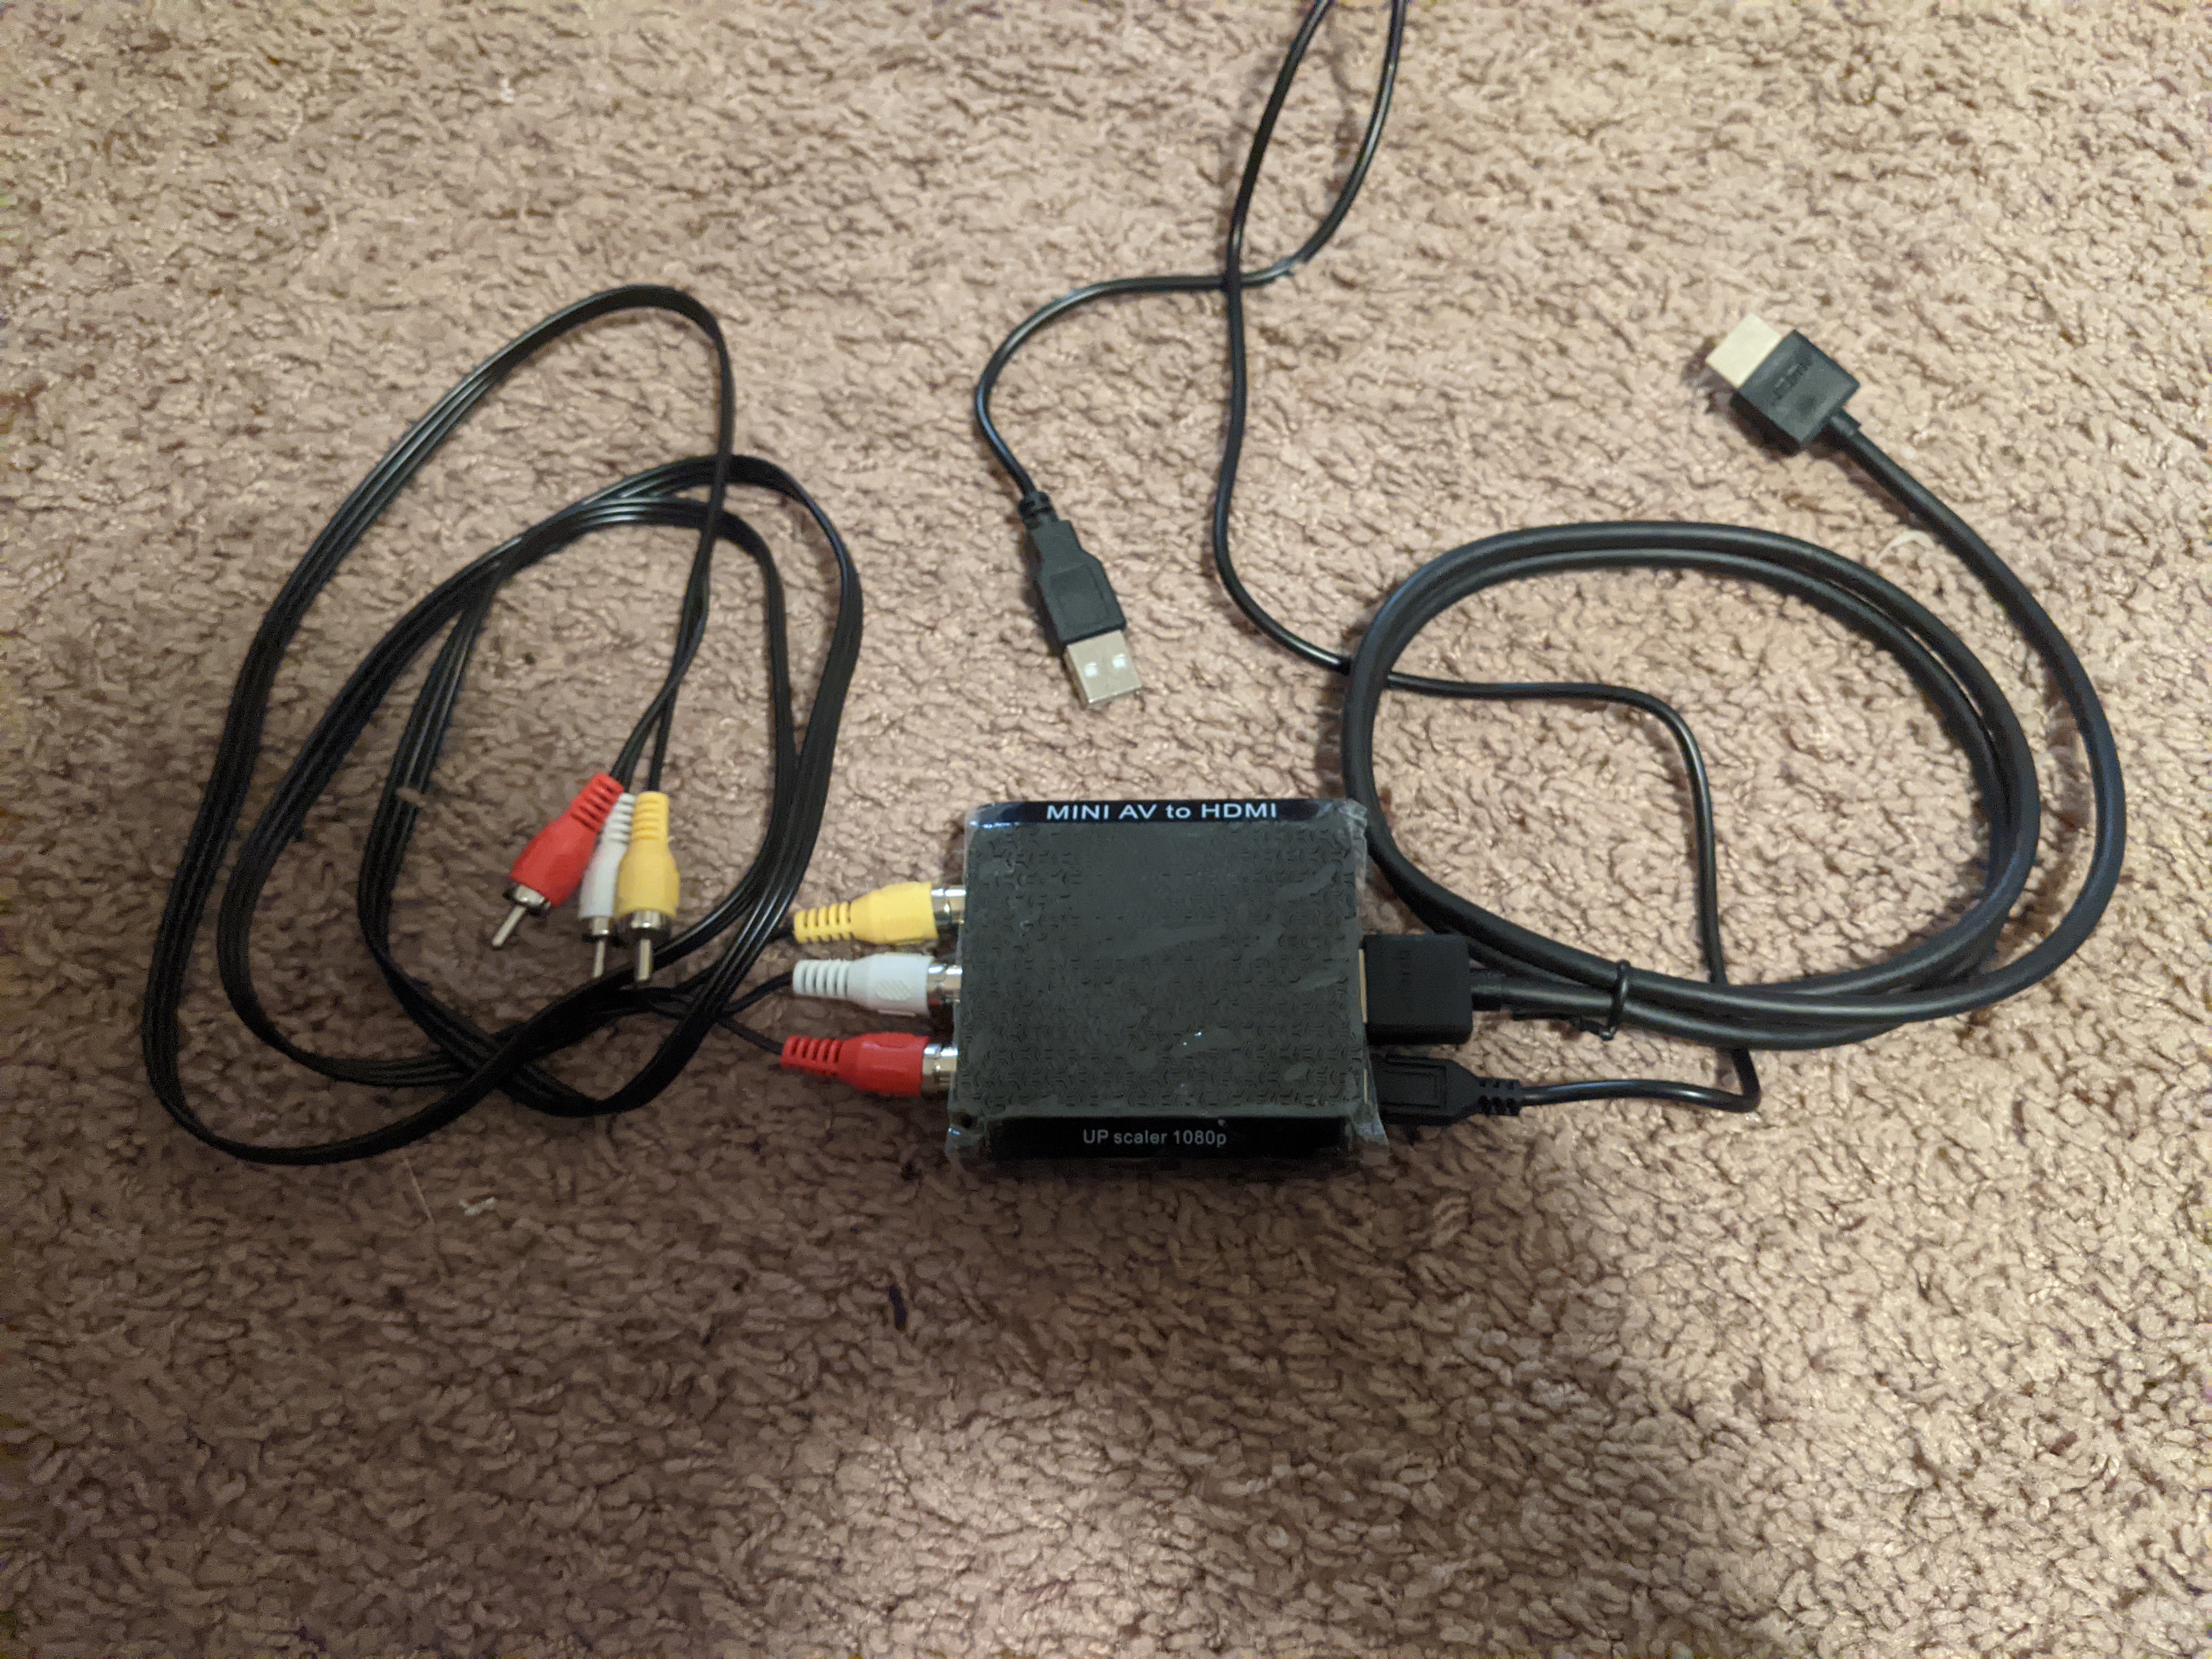
I had an Elgato Cam Link 4k (paid link), but that only has an HDMI input, and VCR predated HDMI by a fair bit. I did some searching and I was able to find an RCA to HDMI converter (paid link) that worked out great. I got the version that came with cables, so I didn’t then have to hunt for some RCA cables.
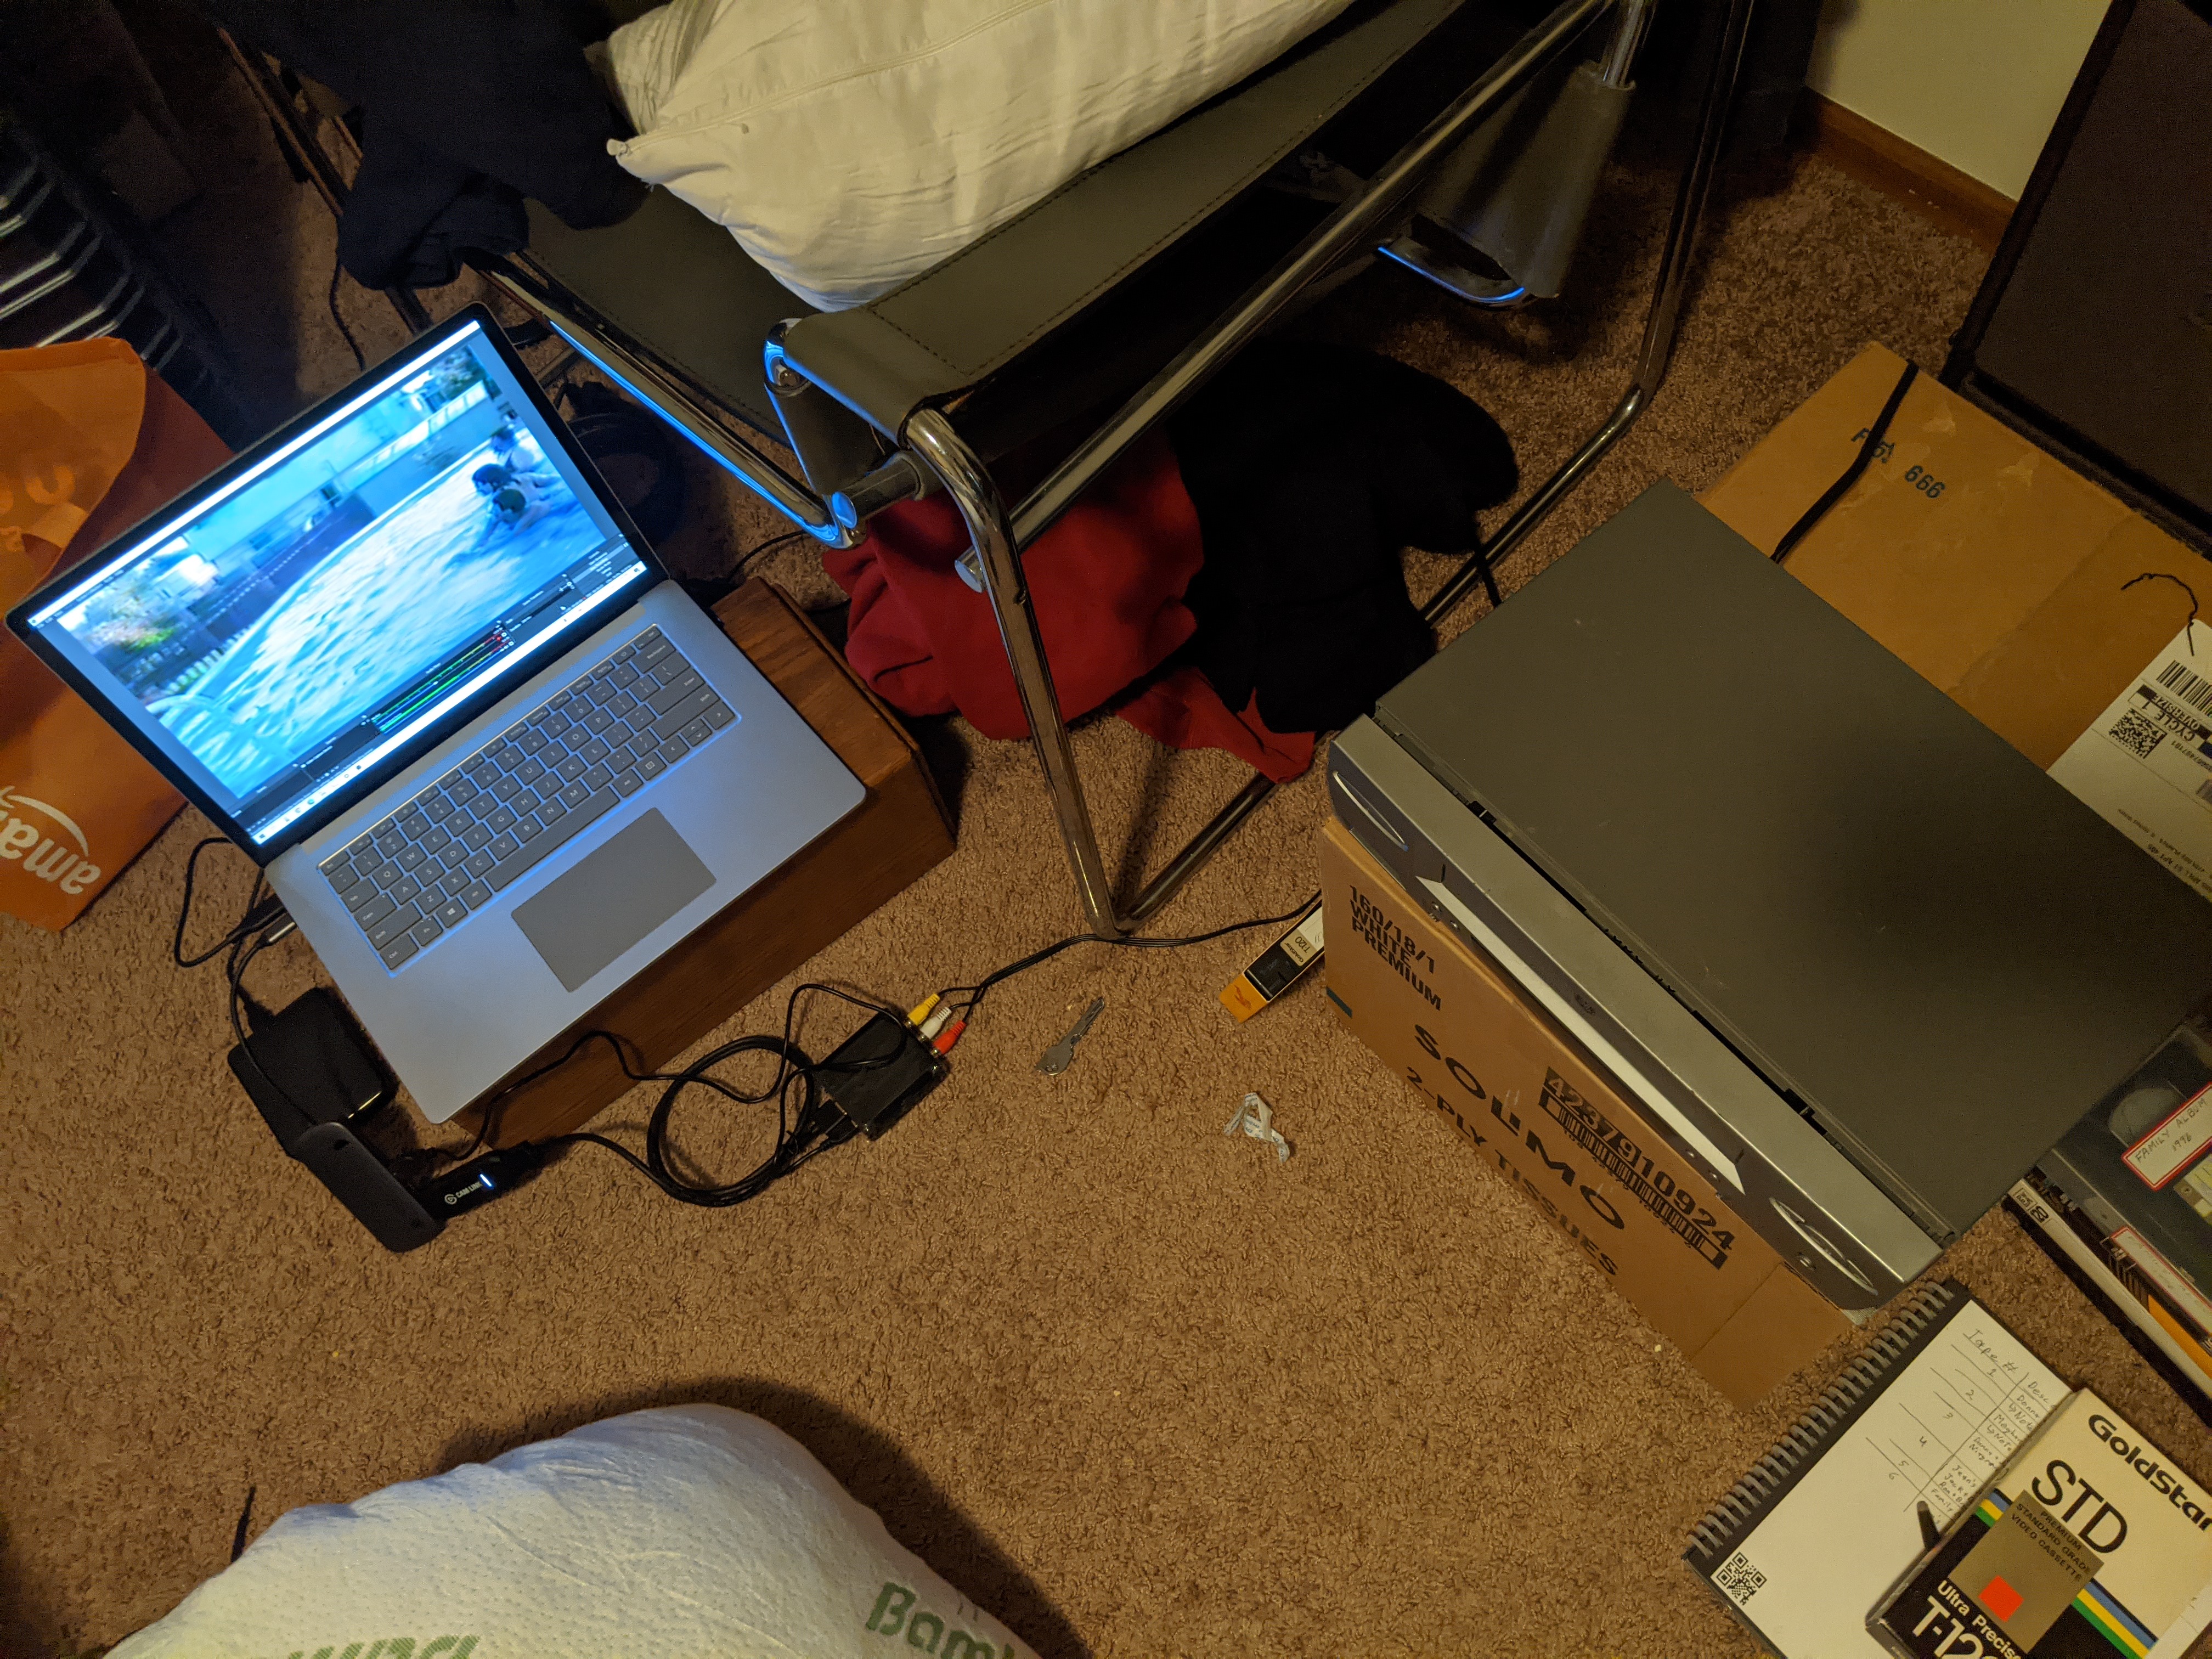
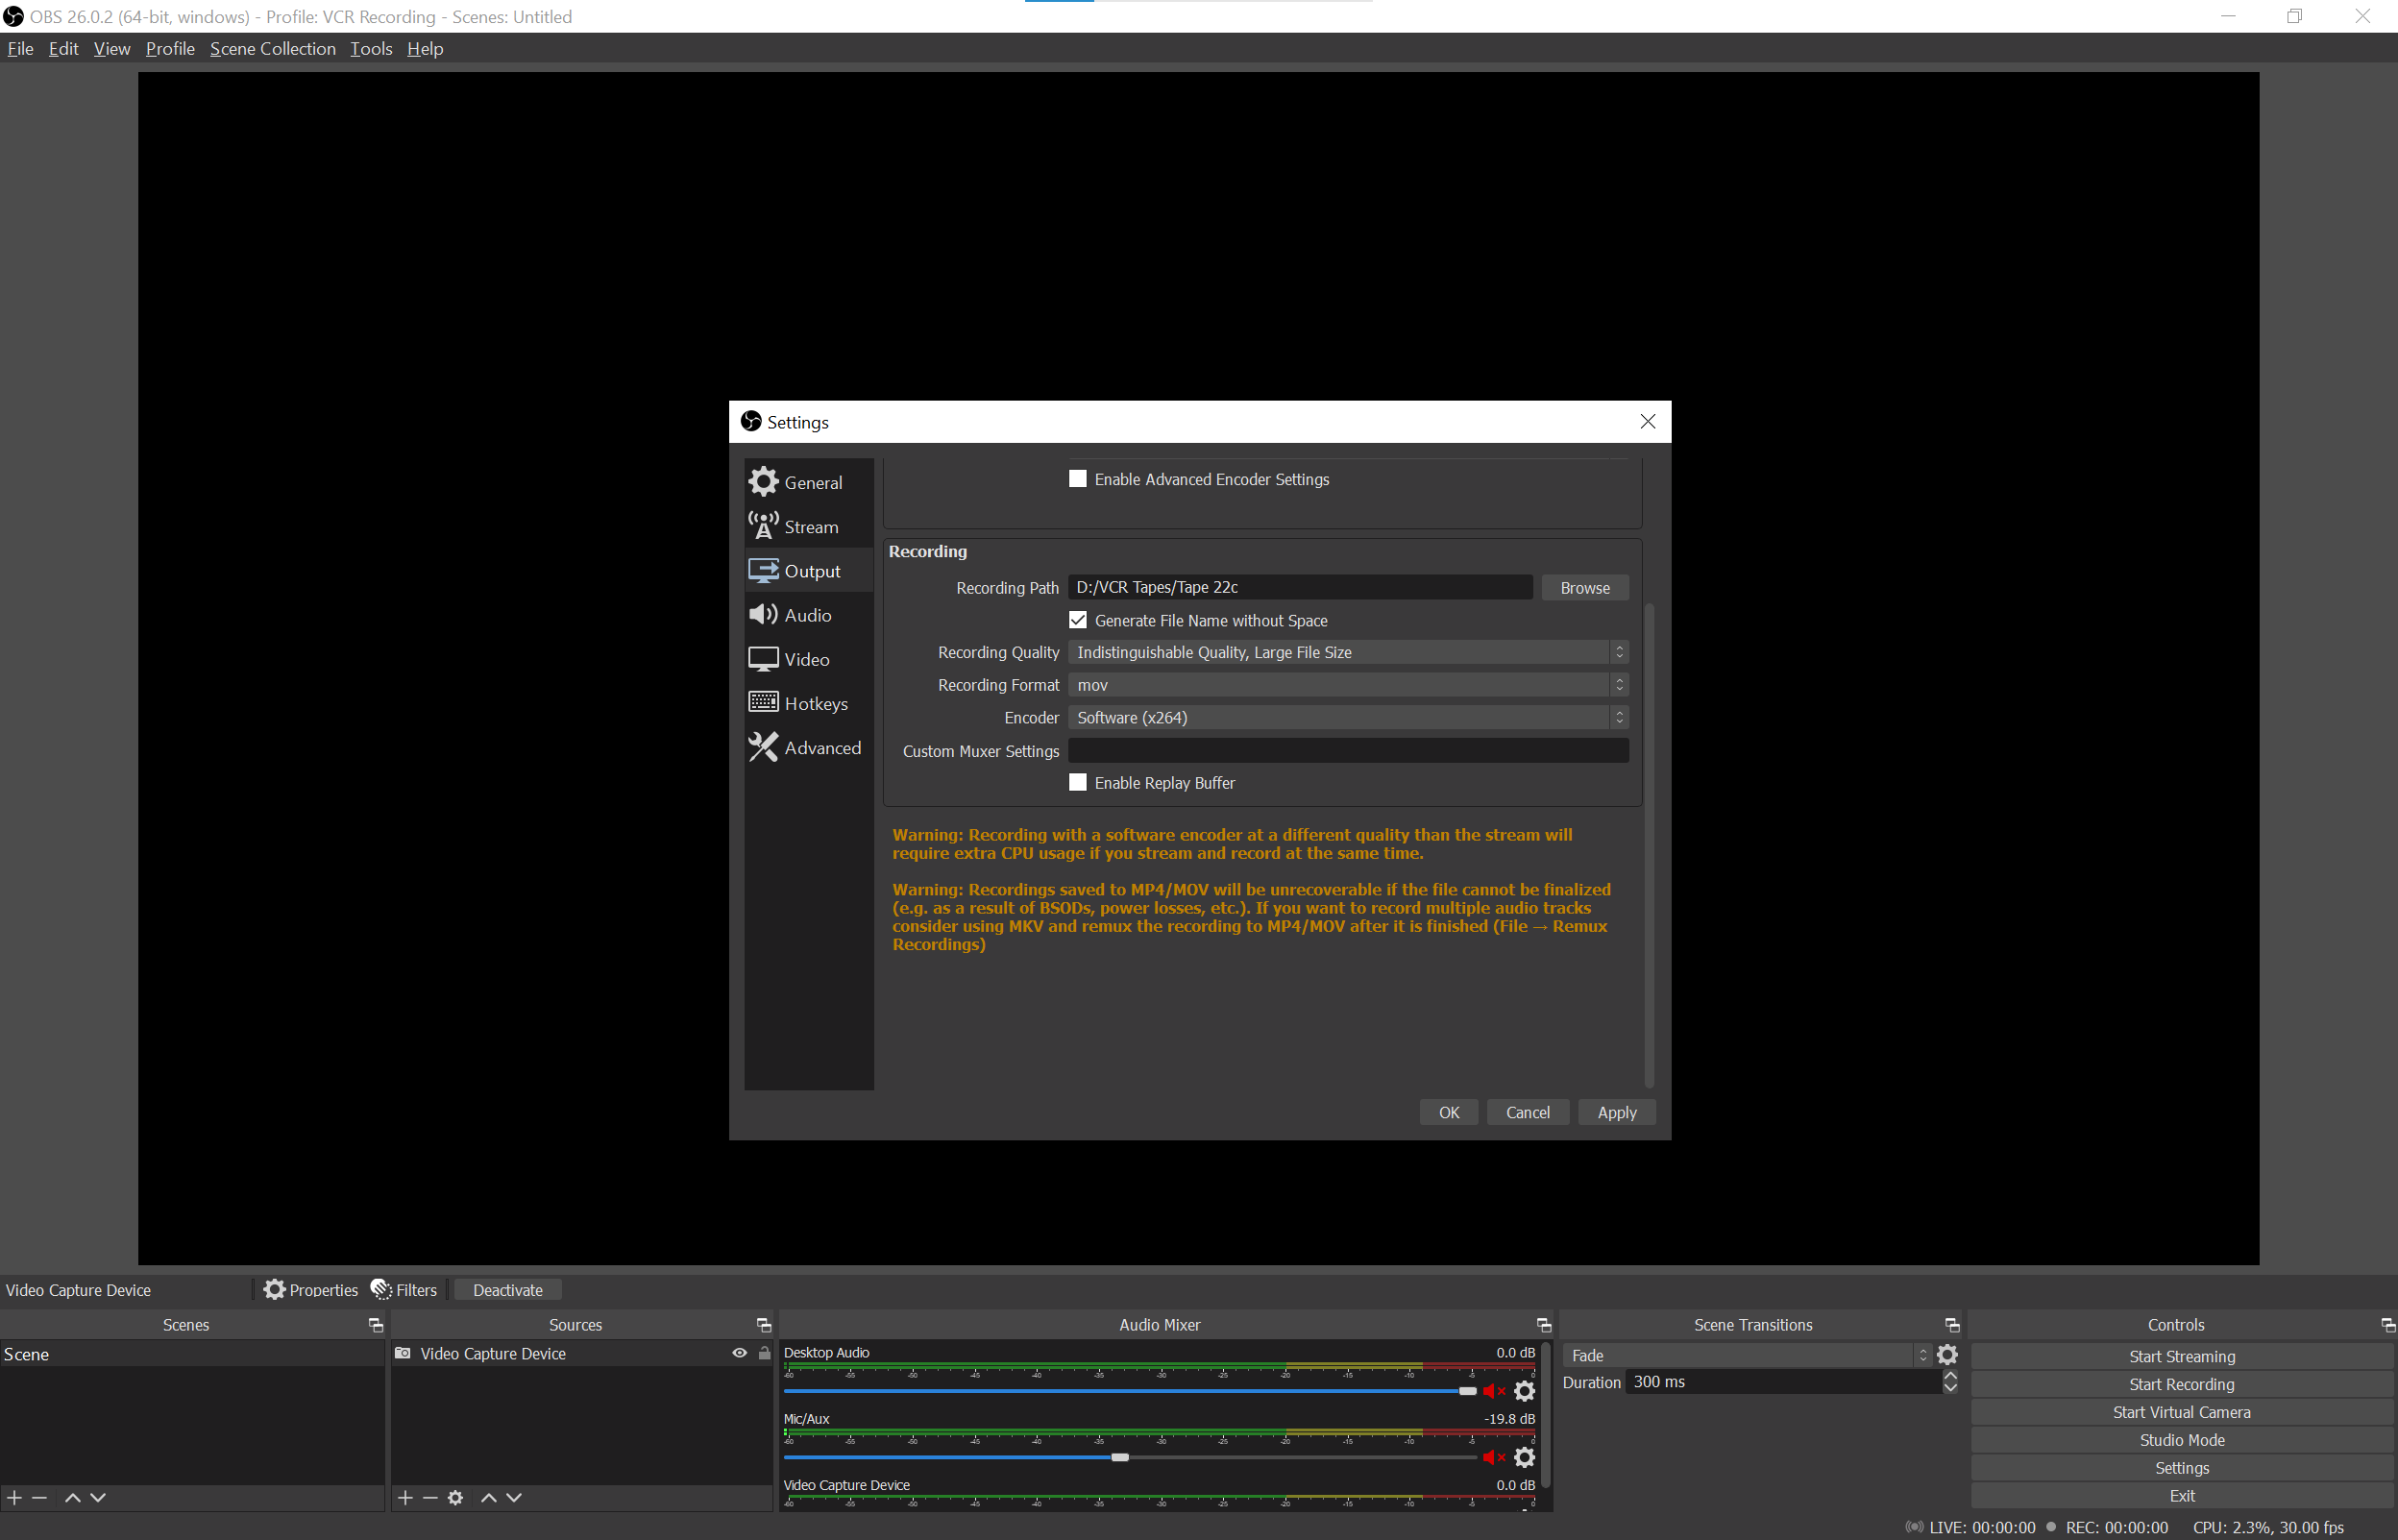
After the hardware acquisitions, it was just a matter of hooking it up to my laptop (along with an external hard drive) starting to record the tapes. To actually record the video I used the free and open-source tool OBS. OBS it typically used by people looking to live stream on Twitch, YouTube, or other sites, but it can also be used to record to a file. In OBS I setup the Cam Link as a video capture device and configured it to record at 1920x1080 and to record to an external dive. By default OBS records in mkv format. You can change this to mp4, but there is a risk that the file will be unreadable if OBS is not able to finalize the file when you are done recording. Because some of the tapes would be several hours long (thanks to Super Long Play), I decided to record to mkv and convert to mp4 later.
Once I was ready to start recording a tape, I would rewind it to make sure I was at the start, start recording on OBS, hit play on the VCR, and then walk away. I would check in on it every half hour to an hour until it was done. When the tape was done, I would stop the recording on OBS and setup the next tape. Most of the tapes worked without an issue, but there was one that required a lot more work.
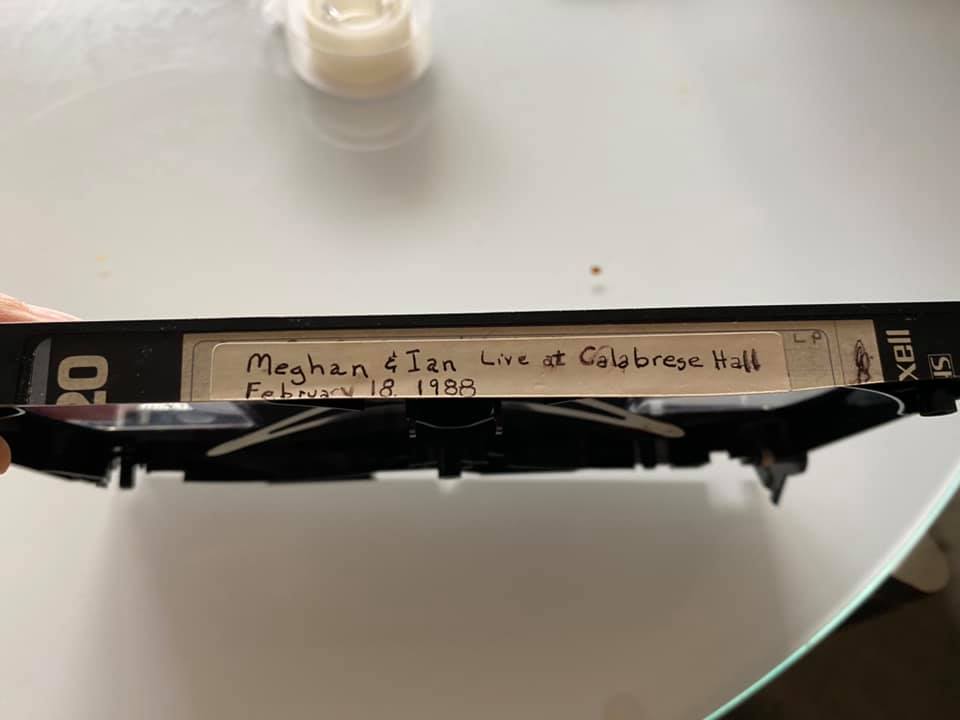
It was probably the oldest tape that I was trying to convert. It had some video on it of my sister and I from when we were very little. It broke while I was rewinding it to the start. Of course I didn’t know that until I started playing it and heard bad tape crunching noises coming from the machine. Fortunately it didn’t break in the middle, but the end had come loose from the take-up spool. I had to carefully open up the cassette and reattach the end to the spool with some tape. I also did my best to flatten some of the tape that had gotten wrinkled, but I don’t think that helped that much.
Once I had all the tapes recorded I wanted to do a little processing and cleanup. First I wanted to convert them to mp4, because that is a more commonly used format and my video editing tools don’t work with mkv files. I also wanted to break the files up into discrete events, since many of the tapes had multiple different events on them (along with movies recorded from broadcast TV).
To convert the files I used FFmpeg and a bash script to help automate the process (see script below). I also took this time to create “proxies” to make editing the files a bit faster. The idea of a proxy file is to create a copy of the original video that is significantly smaller in both size and resolution. The proxy is much easier for the editor to load into memory and allows you to scrub through the video faster than if you were using the original file. Once you’re done editing, you can “relink” the media to the original version of the video and export your clips.
#! /bin/bash

me=`basename "$0"`
INPUT="$1"
OUTPUT="${INPUT%.*}.mp4"

if [ "$INPUT" = "" ] || [ "$INPUT" = "-h" ]
then
	echo "Usage: $me FILENAME"
	exit 0
fi

mkdir -p proxies
ffmpeg -i $INPUT -codec copy $OUTPUT
ffmpeg -i $OUTPUT -vf "scale=iw/2:ih/2" proxies/$OUTPUT
The video editing software I used was Davinci Resolve by Blackmagic Design. I decided to use this because, 1) the base version is free and 2) it’s a very powerful and professional grade tool. I won’t go too deep into exactly how I edited each tape, but the general workflow was.
- create a new project called “Tape #”
- on the Media panel, create two buckets, Original and Proxy
- import the media into the buckets (Original first to get the size and frame rate right)
- move to the Cut panel and drag the proxy to the timeline
- trim the start and end of the video
- duplicate Timeline1 and switch to the new copy
- put cuts at the start and end of the event I want and delete the parts I don’t
- repeat steps 6 and 7 until there is a timeline for each event
- move to the Edit panel
- find and highlight the video in the Original bin in the Media Pool
- right click the clip in the timeline and uncheck “Conform Lock Enabled”
- right click again and click “Conform Lock with Media Pool Clip”
- repeat steps 11 and 12 with each timeline
- move to the Deliver panel and create a render job for each timeline.
And then repeat that for each tape recorded. It looks like a lot of work, but it’s not so bad once you get into a rhythm with it. (If you really want me to go into more detail about this, @ me on Twitter)
In all I converted 22 VHS tapes and generated 52 separate video clips taking up about 51 Gigs of disk space.